Introduction
C# Program to Print “Hello, World!”. This program is compiled and tested on a Visual Studio 2012.
Result

C# Program to Print “Hello, World!”. This program is compiled and tested on a Visual Studio 2012.

In this practical scenario, we are going to learn how to crack WiFi password. We will use Cain and Abel to decode the stored wireless network passwords in Windows. We will also provide useful information that can be used to crack the WEP and WPA keys of wireless networks.
Step 1) Download the Cain and Abel tool
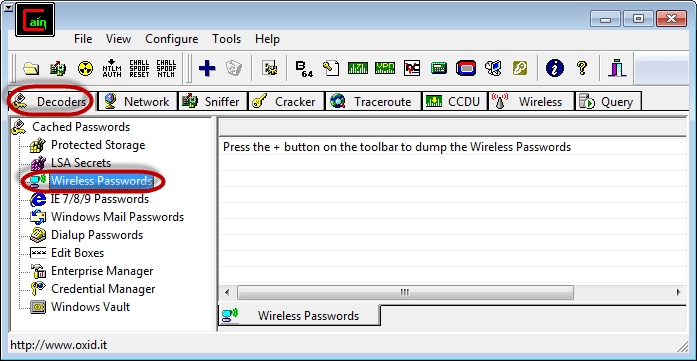
Step 2) Select the Decoders tab and choose Wireless passwords
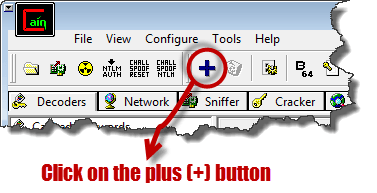
Step 3) The passwords will be shown

Step 4) Get the passwords along with encryption type and SSID
Webcams, as an easy & cost-effective way to take images from video stream, is widely used in the business world. To save your time & energy to integrate webcam capture to your WinForms application, Dynamsoft developed the Dynamic .NET TWAIN SDK. With it, you can develop a web camera capture module in C# with a few lines of code. If you use VB.NET, please check out this blog post.
Create a simple Windows Forms Application in C#. Add Dynamic .NET TWAIN to the Toolbox: Assume you have it installed, you can browse and add DynamicDotNetTWAIN.dll in the installation folder of Dynamic .NET TWAIN (C:\Program Files (x86)\Dynamsoft\Dynamic .NET TWAIN Trial\Redistributable).
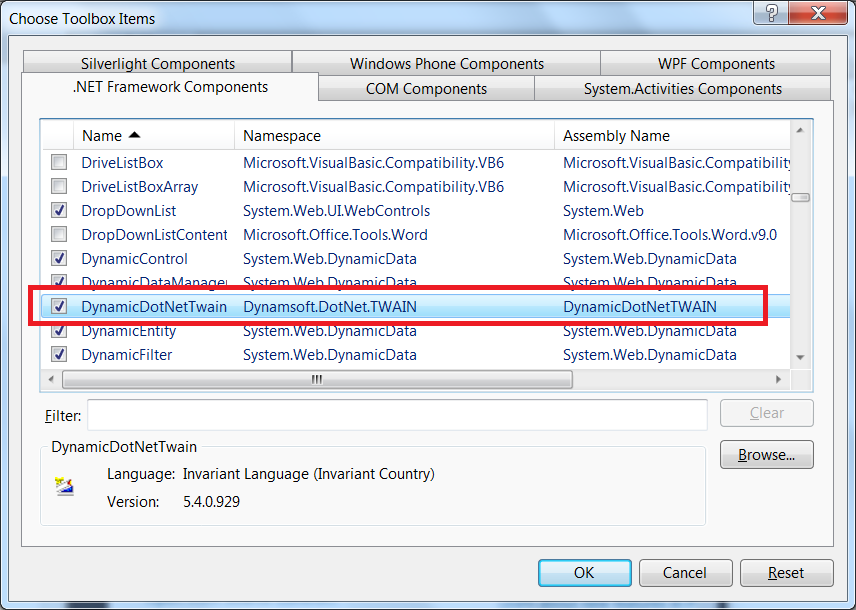
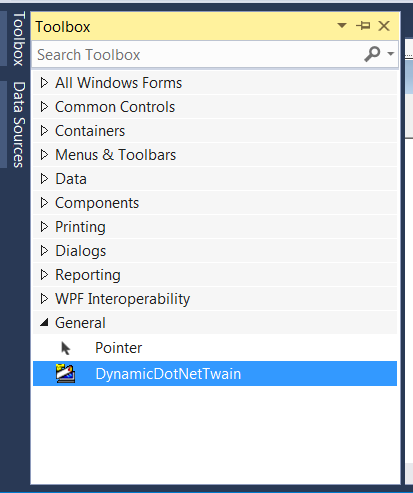
Drag & drop DynamicDotNetTwain to your form to create a control: Add a picturebox to the form as the video container. Add buttons for selecting cameras, acquiring images, and removing images. See below: 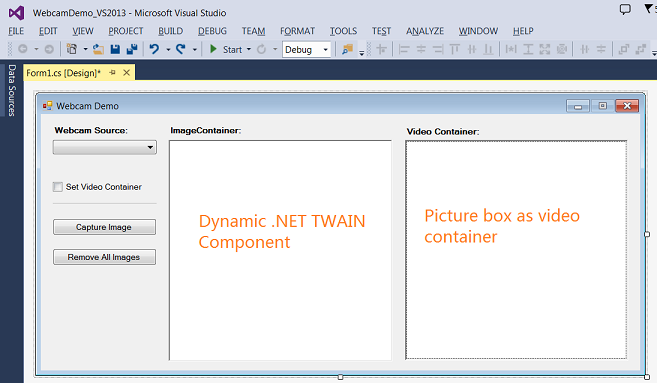
//Select a source
private void btnSelect_Click(object sender, EventArgs e)
{
    try
    {
        dynamicDotNetTwain1.SelectSource();
        dynamicDotNetTwain1.SetVideoContainer(pictureBox1);
        dynamicDotNetTwain1.OpenSource();
        //List the source name and resolutions
        txtSourceName.Text = dynamicDotNetTwain1.CurrentSourceName;
        int count = dynamicDotNetTwain1.ResolutionForCamList.Count;
        for (int j = 0; j < count; j++)
        {
            string tempHeight = dynamicDotNetTwain1.ResolutionForCamList[j].Height.ToString();
            string tempWidth = dynamicDotNetTwain1.ResolutionForCamList[j].Width.ToString();
            string tempResolution = tempWidth + "X" + tempHeight;
            comboResolution.Items.Insert(j, tempResolution);
            comboResolution.SelectedIndex = 0;
        }
    }
    catch (Exception exp)
    {
        MessageBox.Show(exp.Message);
    }
}
//Acquire an image
private void btnAcquire_Click(object sender, EventArgs e)
{
    try
    {
        dynamicDotNetTwain1.EnableSource();
    }
    catch (Exception exp)
    {
        MessageBox.Show(exp.Message);
    }
}
Dynamic .NET TWAIN provides internal encoder for BMP, JPEG, PNG, (multi-page) TIF and (multi-page) PDF.
private void btnSave_Click(object sender, EventArgs e)
{
    SaveFileDialog saveFileDialog = new SaveFileDialog();
    saveFileDialog.FileName = "test.pdf";
    saveFileDialog.Filter = "pdf files (*.pdf)|*.pdf|All files (*.*)|*.*";
    if (saveFileDialog.ShowDialog() == System.Windows.Forms.DialogResult.OK)
    {
        dynamicDotNetTwain1.SaveAllAsPDF(saveFileDialog.FileName);
    }
}
To build your own webcam capture module using the SDK, download the 30-day free trial of Dynamic .NET TWAIN.
This artice was originally posted on CodeProject.
If you are interested in embedding webcam capture in a browser-based application, you may take a look at Dynamsoft Webcam SDK.
The objective is to install G++ the C++ compiler on Ubuntu 18.04 Bionic Beaver
Privileged access to your Ubuntu System as root or via sudo command is required.
sudo commandThe following linux command will install gcc compiler on on Ubuntu 18.04 Bionic Beaver. Open up terminal and enter:
$ sudo apt install g++
Another way to install g++ compiler is to install it as part of build-essential package. Additionally the build-essential package will also install additional libraries as well as gcc compiler. In most cases or if unsure this is exactly what you need:
$ sudo apt install build-essential
Confirm your installation by checking for GCC version:
$ g++ --version
g++ (Ubuntu 7.2.0-18ubuntu2) 7.2.0
Copyright (C) 2017 Free Software Foundation, Inc.
This is free software; see the source for copying conditions.  There is NO
warranty; not even for MERCHANTABILITY or FITNESS FOR A PARTICULAR PURPOSE.
Compile a simple C++ “Hello World” code:
#include <iostream>
using namespace std;

int main()
{
    cout << "Hello, World!";
    return 0;
}
Save the above code within hello.cc file, compile and execute it:
$ g++ -o hello hello.cc
$ ./hello
Hello, World!
Published: By: Code Tutorial - January 24, 2023
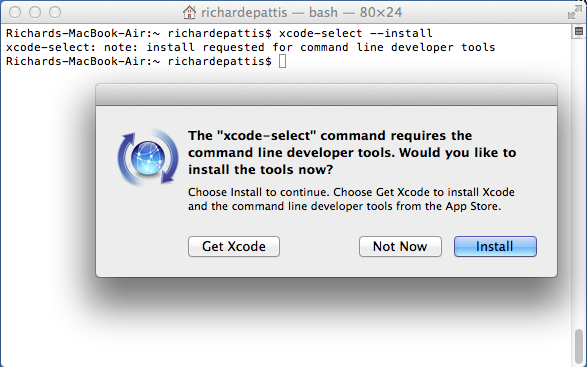
If instead you see the message "xcode-select: error: command line tools are already installed, use "Software Update" to install updates," then open the App Store and check to see if there are any software updates available for Xcode. If not, then you're all done, and you can proceed to the directions for installing CLion.


Dev-C++, developed by Bloodshed Software, is a fully-featured graphical IDE (Integrated Development Environment) for C and C++ programming. It is distributed under the GNU General Public License for programming in C and C++.
There are many compilers available for C++ programming. You can download anyone. Here, we are going to use Dev C++. It will work for both C++ and C programming languages.
To install Dev C++ software, you need to follow the following steps.
Step 1) First you must download the Dev C++ on your Windows machine. Visit to Download Dev C++: http://www.bloodshed.net/
Step 2) There are packages for different Operating Systems.
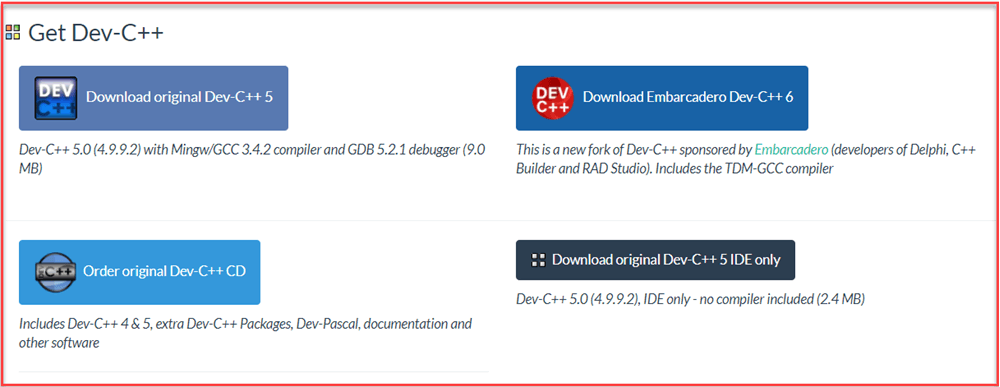
Step 3) Under package Dev-C++ 5.0 (4.9.9.2) with Mingw/GCC 3.4.2 compiler and GDB 5.2.1 debugger (9.0 MB) Click on the link “Download from SourceForge”.

Step 4) This package will download C++ .exe file for Windows that can be used to install on Windows 7/8/XP/Vista/10.
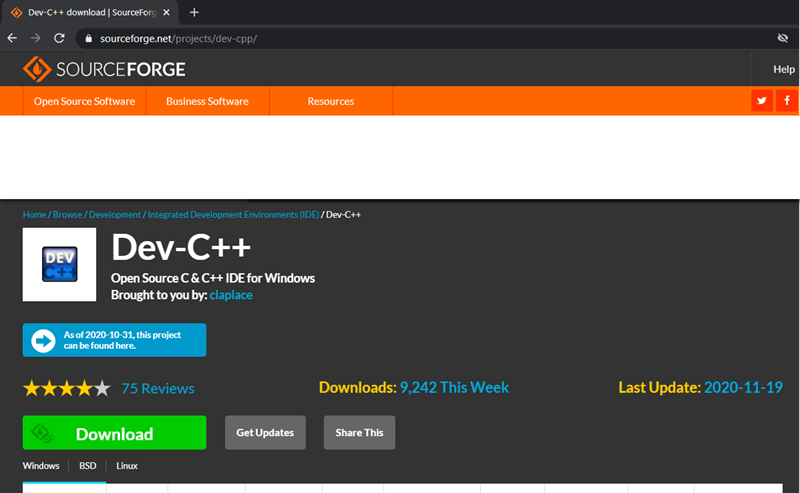
Step 5) You will direct to SourceForge website, and your C++ download will start automatically.
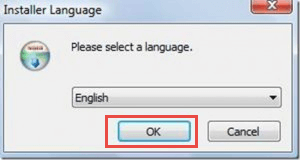
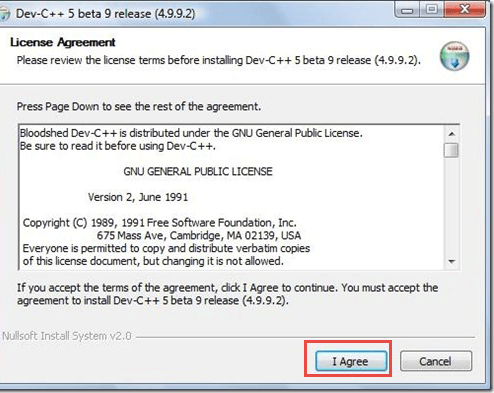
Step 6) In this step,
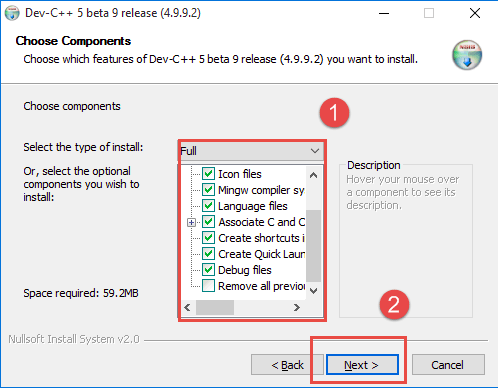
Step 7) In this step,
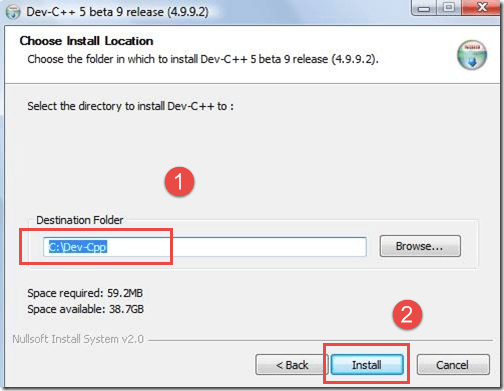
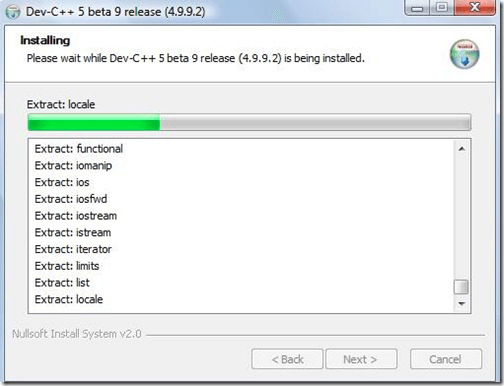
In the next screen, installation begins
Now, Dev C++ is installed successfully on your Windows. Select ” Run Dev C++” to run it and click on ” Finish” button.
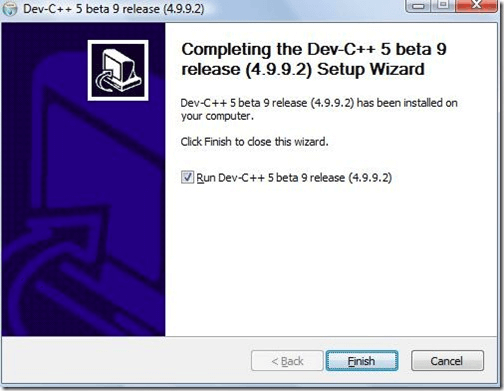
That’s it! Now you are ready to compile your C or C++ programs with Dev C++ compiler.
Copyright © . Designed By Templatezy